No, not anyone I go busking with, “Busking Buddy” refers to my ‘mobile’ (ha ha) power supply. I did not come up with the name, If you Google “Busking Buddy” you’ll find a guy in Australia that came up with the concept and name. The original concept Busking Buddy (let’s call it BB for short) contained a small (I guess it was small anyway) battery and inverter as well as being a place to store a combo amp/speaker and a few other bits and pieces.
In contrast my BB is mainly just for the batteries and inverter although I did put a space in there to hold my mixer so that it was not just sitting on the floor. The main weight component in a BB is or are the batteries. The original BB looked to be pretty light although I am sure it weighed in around 20 or 30 lbs because of the battery. My BB uses TWO 35 AH Sealed Lead Acid Batteries and the batteries alone weigh almost 50 lbs!
So without further ado here a some pictures to show how I built my ‘Busking Buddy’…
Battery Hold Down
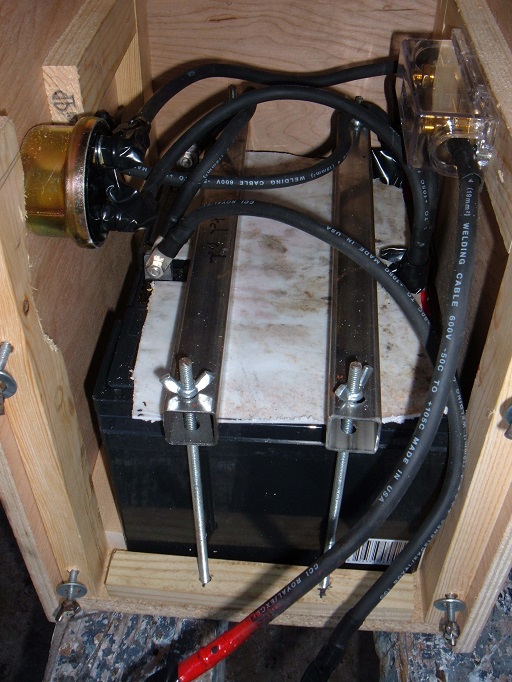
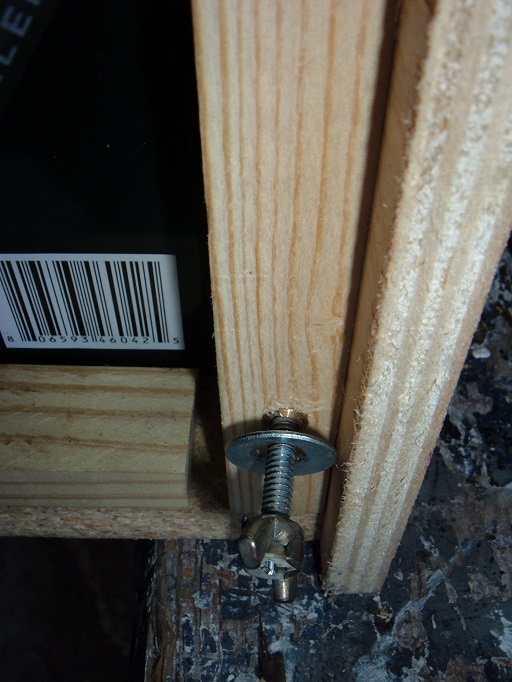
SLA (Sealed Lead Acid) batteries can operate in any position and don’t (or shouldn’t anyway) leak but they still need to be secured so they don’t rattle around and get damaged. The two batteries just fit side by side in the base of the box. I screwed some battens to the floor so that they cannot move side to side. I knocked some ‘knock in’ T nuts into the side stays to take some quarter inch threaded rod then drilled some holes into some square box section I had that sits on top of the batteries and is held down with some wing nuts. The white stuff above the batteries is just a piece of plastic I placed over them to help protect them.
I can turn the box upside down and the batteries do not move so I think I achieved my goal of securing them!
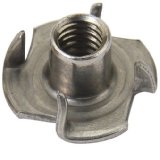
This is the sort of knock in T nut I used:
Fuse
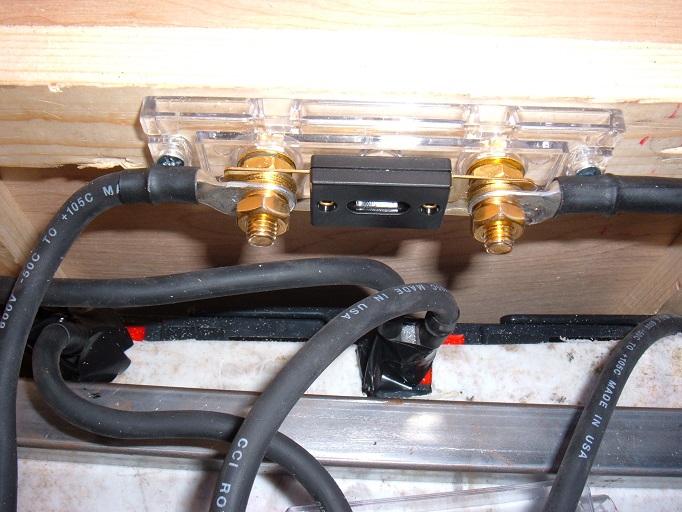
I placed an ANL fuse holder in the circuit between the battery positive and the inverter. There’s a clear plastic cover that goes over the fuse and terminals to avoid any accidents with leads touching and you might notice in some of the pictures that I’ve wrapped electrical tape around the battery cable ends and battery terminals to avoid accidents with things like wrenches touching terminals when working in there to connect everything up. Currently the fuse holder has a 40 amp fuse in there which should be more than enough for my needs. If I ever get up to the sort of power levels that need 40 amps from the batteries I am not going to be playing long anyway!
Cables
The cables are made up out of #4 welding cable and matching solder on terminals with the ends covered in heat shrink tape. Gotta love e-Bay.
Rear Door

The rear (actually the side) lower panel or door is held in place by four screws that I welded wing nut onto. The screws go into screw in brass inserts in the uprights behind it.
This rear/side panel does not normally need to come off at all but it makes it a LOT easier to get the batteries in and out if needed, or even just to connect up the wiring.
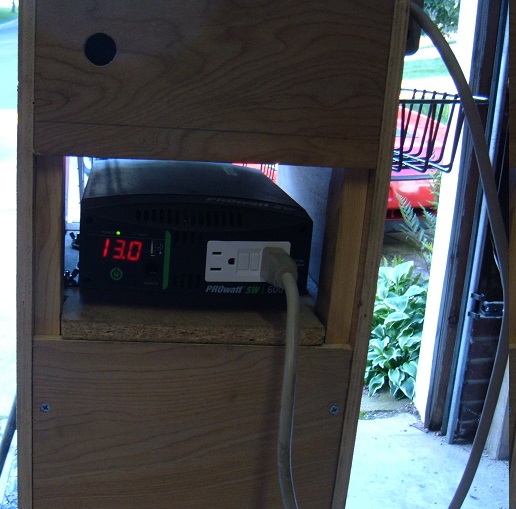
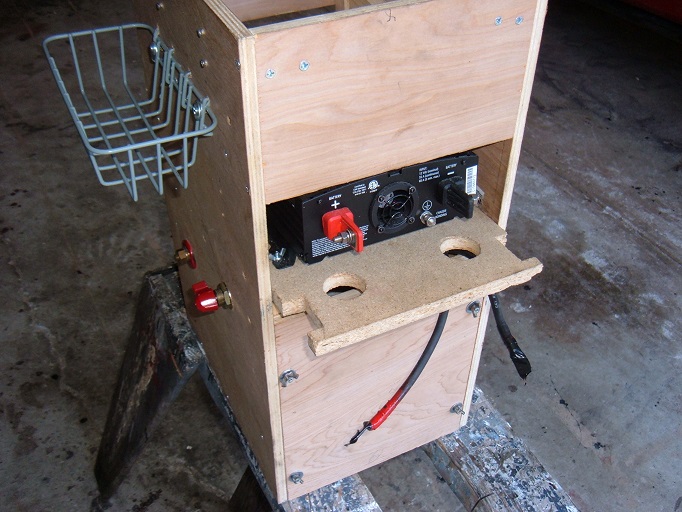
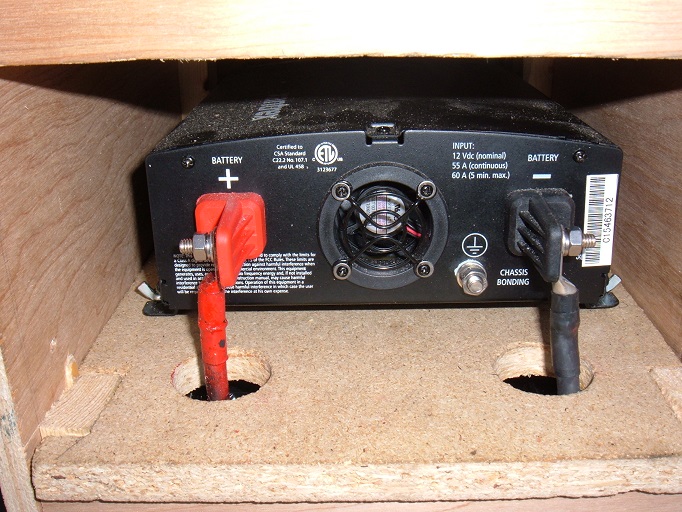
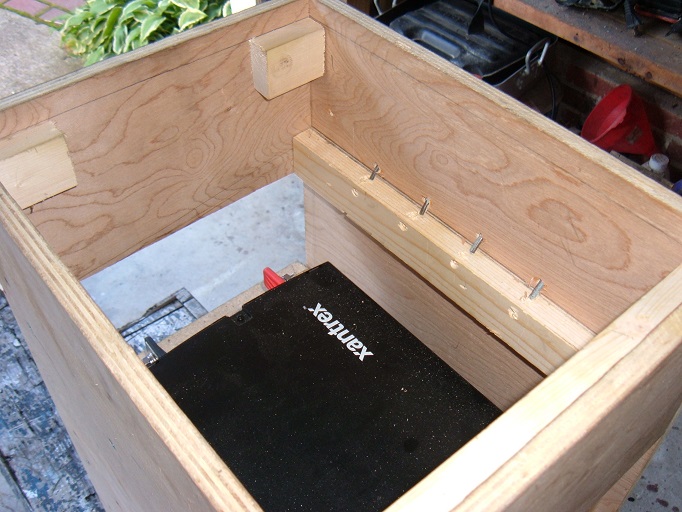
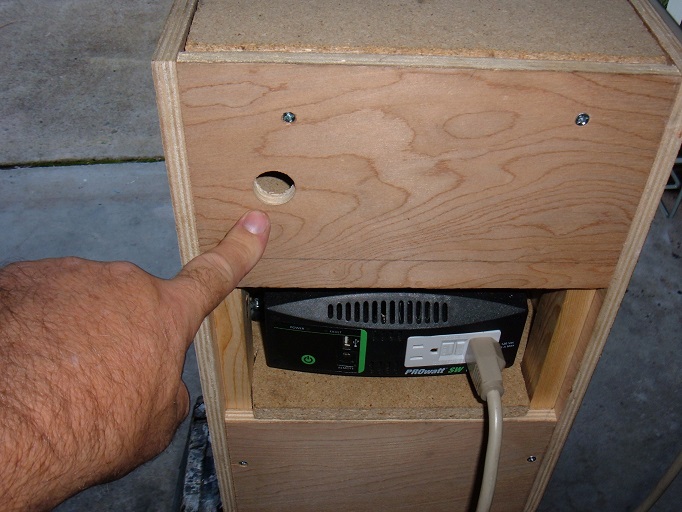
The Inverter
The inverter is a XANTREX Pure sine wave 600 watt unit. It is fastened to a board that sits above the batteries by bolts and wing nuts.
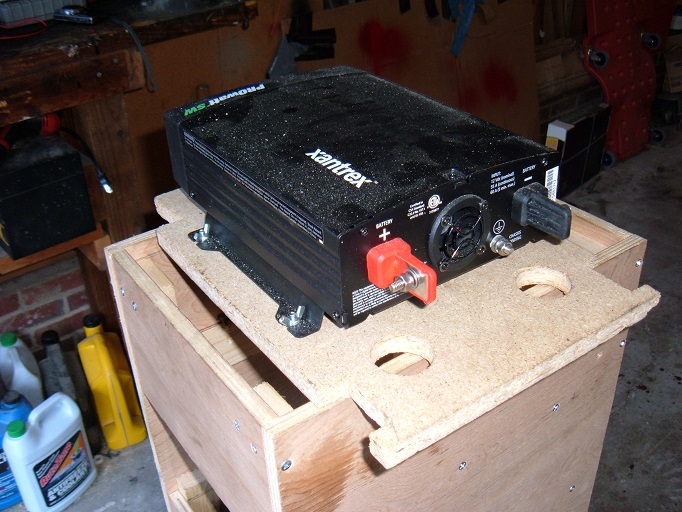
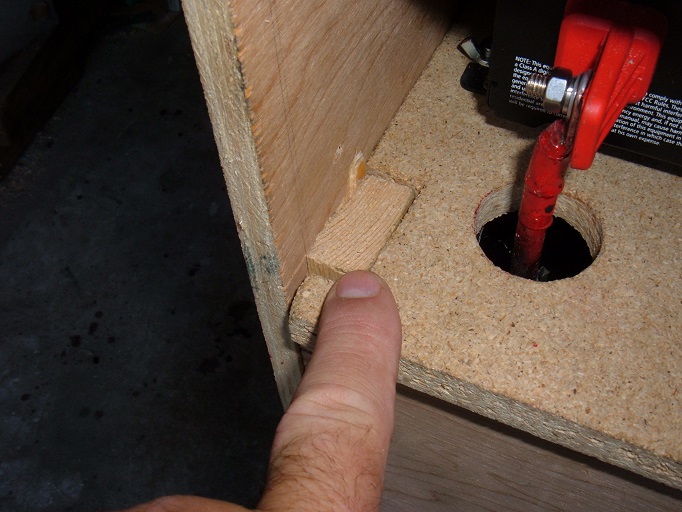
The holes in the board are where the power cables come up through from the battery box to the inverter. The cutouts in the side lock the board into place in the box.
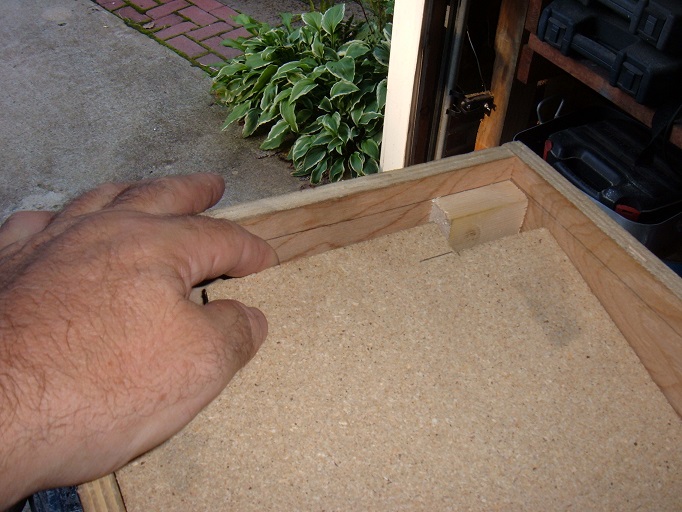
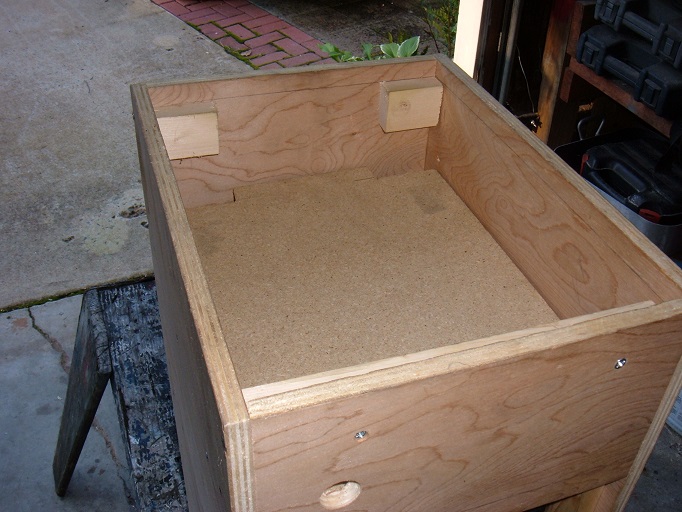
Mixer Section
My mixer is a Behringer MX 802A and I built the box so that it would sit in the top section above the inverter so that it would not get pulled to the floor if I caught a cable or anything and so that it was off the floor and out of the way.
The picture shows the side rails the mixer floor sits on:
There are two short rails at one end that support the box top and the mixer floor panel has cutouts at each end so that it will drop in between those short rails:
My mixer is powered by an external transformer with a lead that screws into the back of the mixer so this hole is there to let me hook up the the power supply lead from the transformer to the mixer. The transformer just sits in a basket on the side of the box and plugs into the power strip.
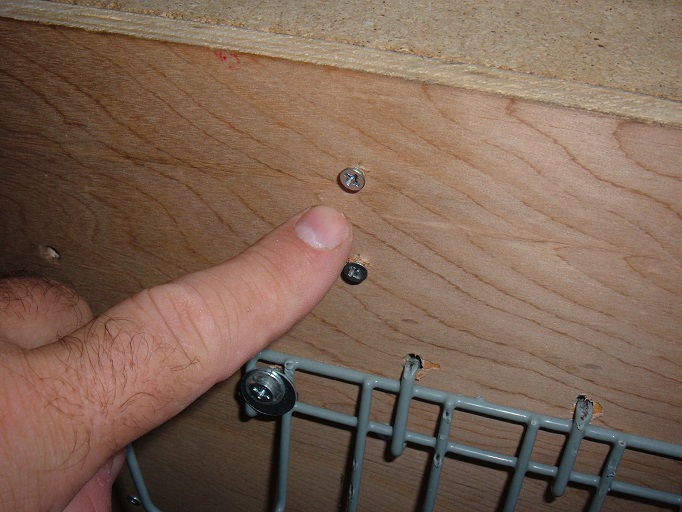
Power Strip
To mount a power strip to the box I screwed some small screws into the side of the box that go into slots on the back of the strip:
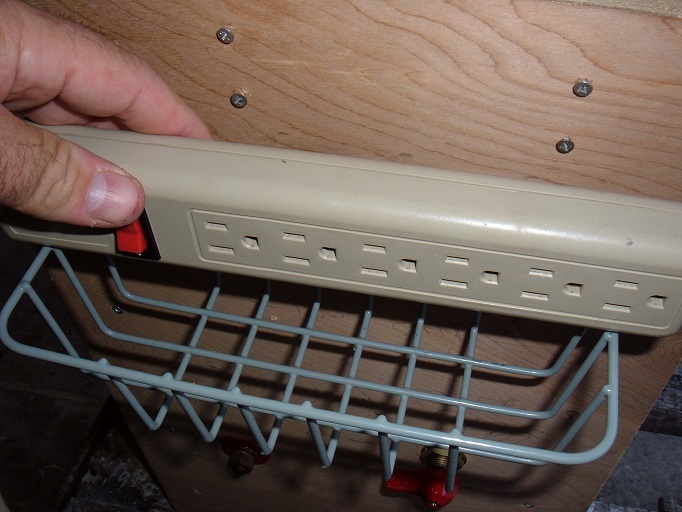
The strip then just plugs into one of the outlets on the front of the inverter:
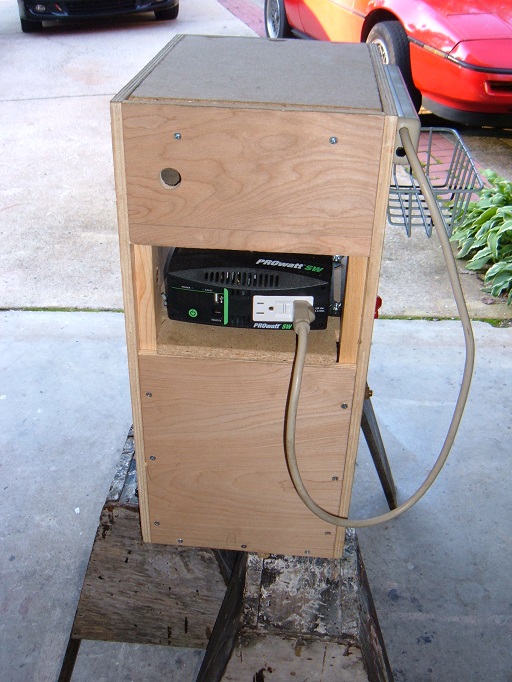
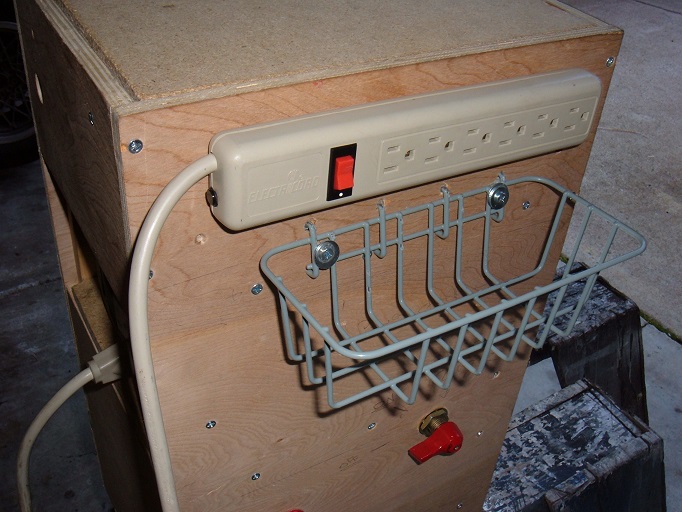
You can also see the lid in the above picture. It’s not really needed although when transporting all my stuff I can put my mixer in the mixer space, put the lid on and then pile stuff on top of the box without damaging the mixer, so it does serve some purpose.
Power Switch and Charging
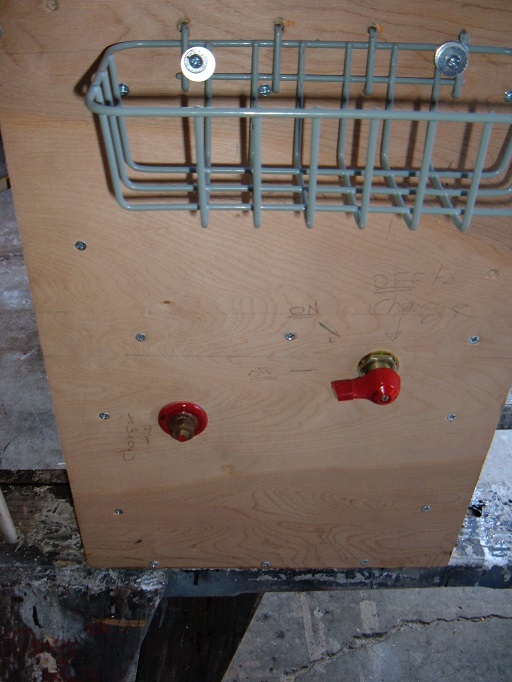
For charging I took a lead form the positive battery terminal to a charging ‘port’ on the back of the box. The charging ‘port’ is just an automotive ‘through bulkhead’ connector. The inverter has a ‘soft’ power switch which means it is never really ‘off’ so to isolate the batteries from the inverter when not in use, for charging and just in case of emergencies I used an automotive (good for 80 amps!) cutoff switch.
To charge the batteries I turn off the power switch (so the charger does not see the inverter as part of the load) and hook up the positive from the charger to the port on the back of the box (which goes directly to the battery positive) and the negative to the negative terminal on the inverter which is connected directly to the batteries negative terminal. That way the two connectors are far enough apart not to accidentally touch when hooking up the charger and cause ‘sparks’!
For ventilation while charging I can either remove the read door of the box or more commonly I just prop up the floor of the inverter box although with the batteries being sealed, ventilation should not be an issue but I do that anyway, ‘just in case’!
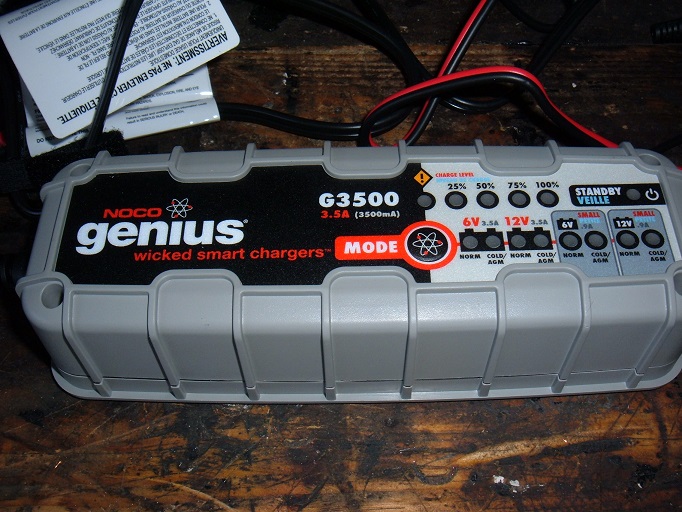
Charger
My charger is a Genius G3500 smart charger which is much better than the regular cheap car battery charger you might get from a car shop as it will not overcharge the batteries.
Voltage
The inverter displays the voltage of the batteries which, as you can see, is 13 volts. I never had over 12.3 volts with the old marine battery so hopefully this is a good indication that switching to new SLA batteries was a good move. I still have to give this lot a test before my next ‘gig’ to see how long I can play for although anything over two hours at a reasonable (IE not too loud) volume will be fine for me but it would be nice if I could manage four hours to give me a buffer (not that I have that much music currently though!)